
Google Calendar
VoiceBooker includes a Google Calendar MCP server. Complete the OAuth flow below to let it access a Google Calendar on behalf of the Google account that you authorize.
The VoiceBooker OAuth endpoint is:
https://voicebooker.de/app/api/v1/oauth21. Create or select a Google Cloud project
- Open the Google Cloud Console.
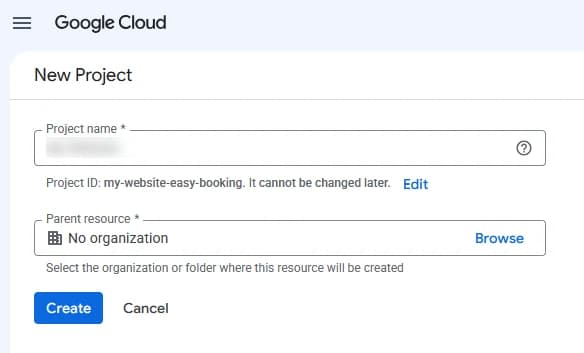
- Create a project, or select the project you want to use for VoiceBooker.
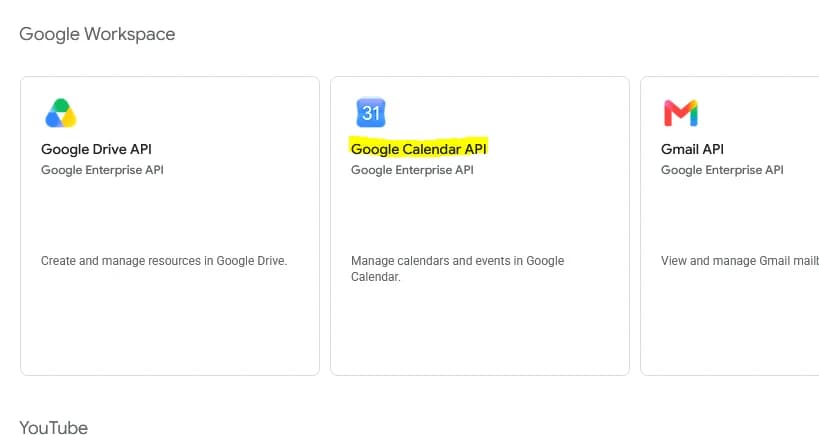
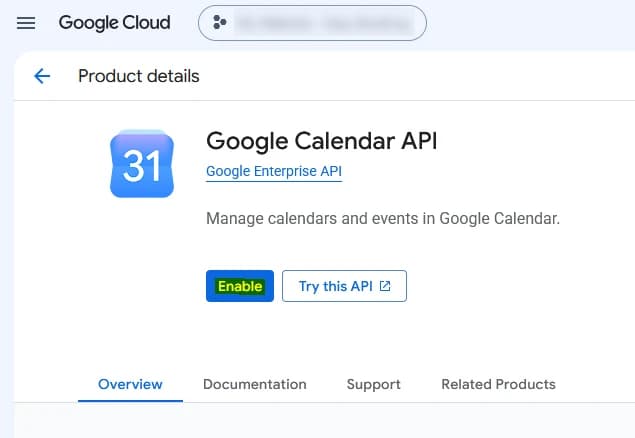
- Open APIs & Services → Library, search for Google Calendar API, and click Enable.
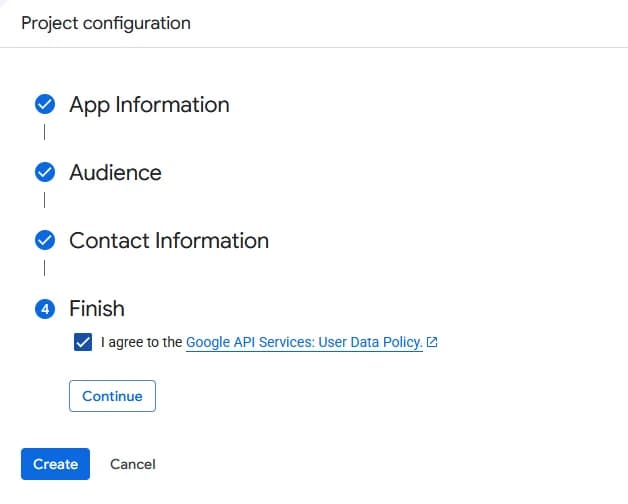
- Open Google Auth Platform and configure the app branding, support email, audience, and contact information.
2. Configure the Calendar scopes
Add these scopes to the OAuth consent screen:
https://www.googleapis.com/auth/calendar.events
https://www.googleapis.com/auth/calendar
The calendar.events scope allows the integration to create, edit, and delete events. The calendar scope allows access to the calendars and calendar settings required by the built-in Google Calendar MCP server.
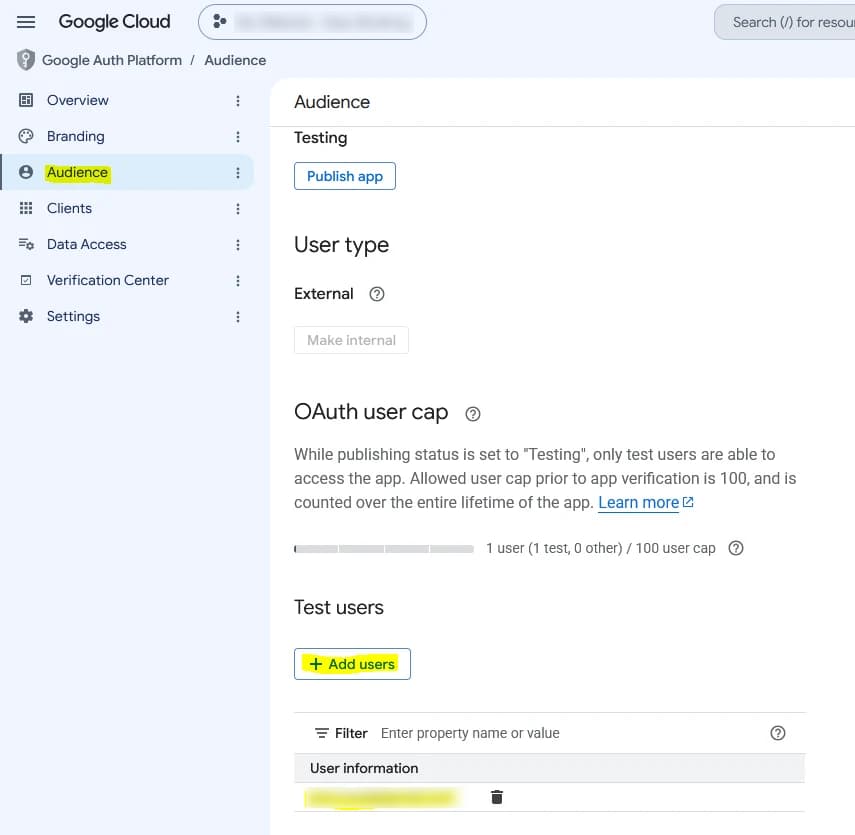
Google may show an unverified app warning while the app is being tested. Add the Google accounts that will test the integration as test users in the OAuth consent configuration. Complete Google’s verification process before making the app available to users outside the test audience.
3. Create the OAuth client
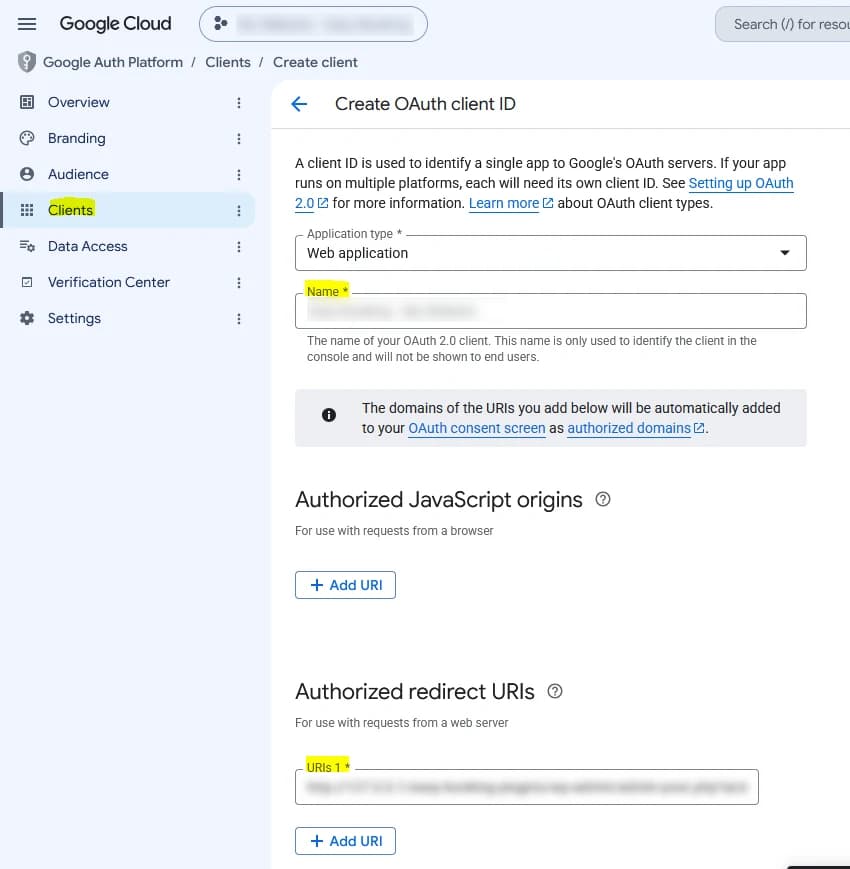
- In Google Auth Platform → Clients, click Create client.
- Select Web application as the application type.
- Add this exact URL under Authorized redirect URIs:
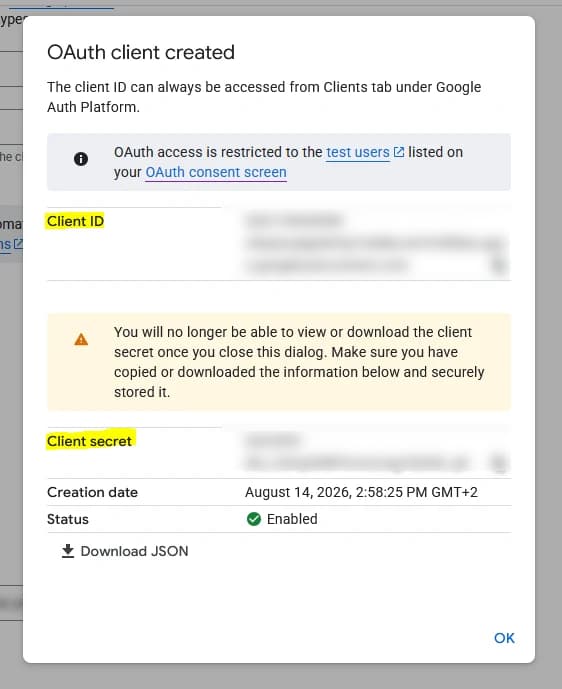
https://voicebooker.de/app/api/v1/oauth2- Create the client and click Download JSON to download the credentials file. Keep this file available for the VoiceBooker Google Calendar integration.
4. Add Google Calendar as an integration in VoiceBooker
Add your Google Calendar account to VoiceBooker. The OAuth flow starts automatically when you test and save the account:
- Go to the Integrations page.
- Click Add integration.
- Choose Google Calendar.
- Click Add new account.
- Give the account a name.
- Click JSON and choose the credentials file you downloaded in the previous step.
- Click Test & save. This automatically starts the OAuth flow.
This integration allows VoiceBooker to use your Google Calendar for appointment booking and related calendar operations.
5. Complete the OAuth flow
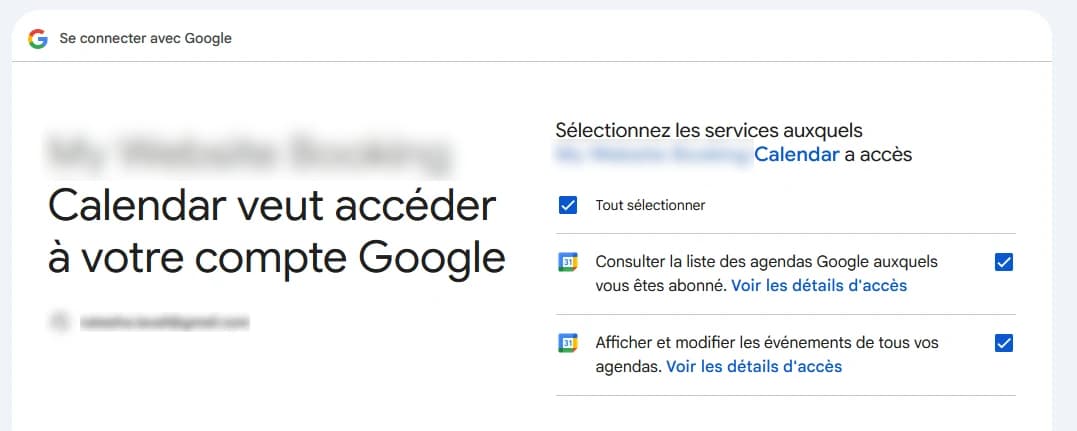
After you click Test & save, VoiceBooker redirects the browser to Google’s authorization page and uses the VoiceBooker OAuth endpoint as the callback.
When Google prompts for consent:
- Sign in to the Google account whose calendar VoiceBooker should use.
- Review the requested Calendar permissions.
- Click Allow.
Google returns the authorization result to https://voicebooker.de/app/api/v1/oauth2. VoiceBooker completes the code exchange and stores the resulting authorization for the built-in Calendar MCP server.
6. Troubleshooting
redirect_uri_mismatch: Check thathttps://voicebooker.de/app/api/v1/oauth2is registered exactly as an authorized redirect URI in Google Cloud.- Google reports that the app is unverified: Add the account as a test user, or complete Google’s OAuth app verification process.
- A Calendar tool is missing: Reconnect the MCP client after completing authorization and confirm that the built-in Google Calendar integration is enabled for the VoiceBooker account.
- Permission denied: Confirm that both required scopes were added and authorize the Google account again.
- The wrong calendar is used: List the available calendars and explicitly configure or tell the assistant which calendar ID to use.
For more information, see Google’s documentation for OAuth 2.0 web-server applications and Google Calendar API scopes.